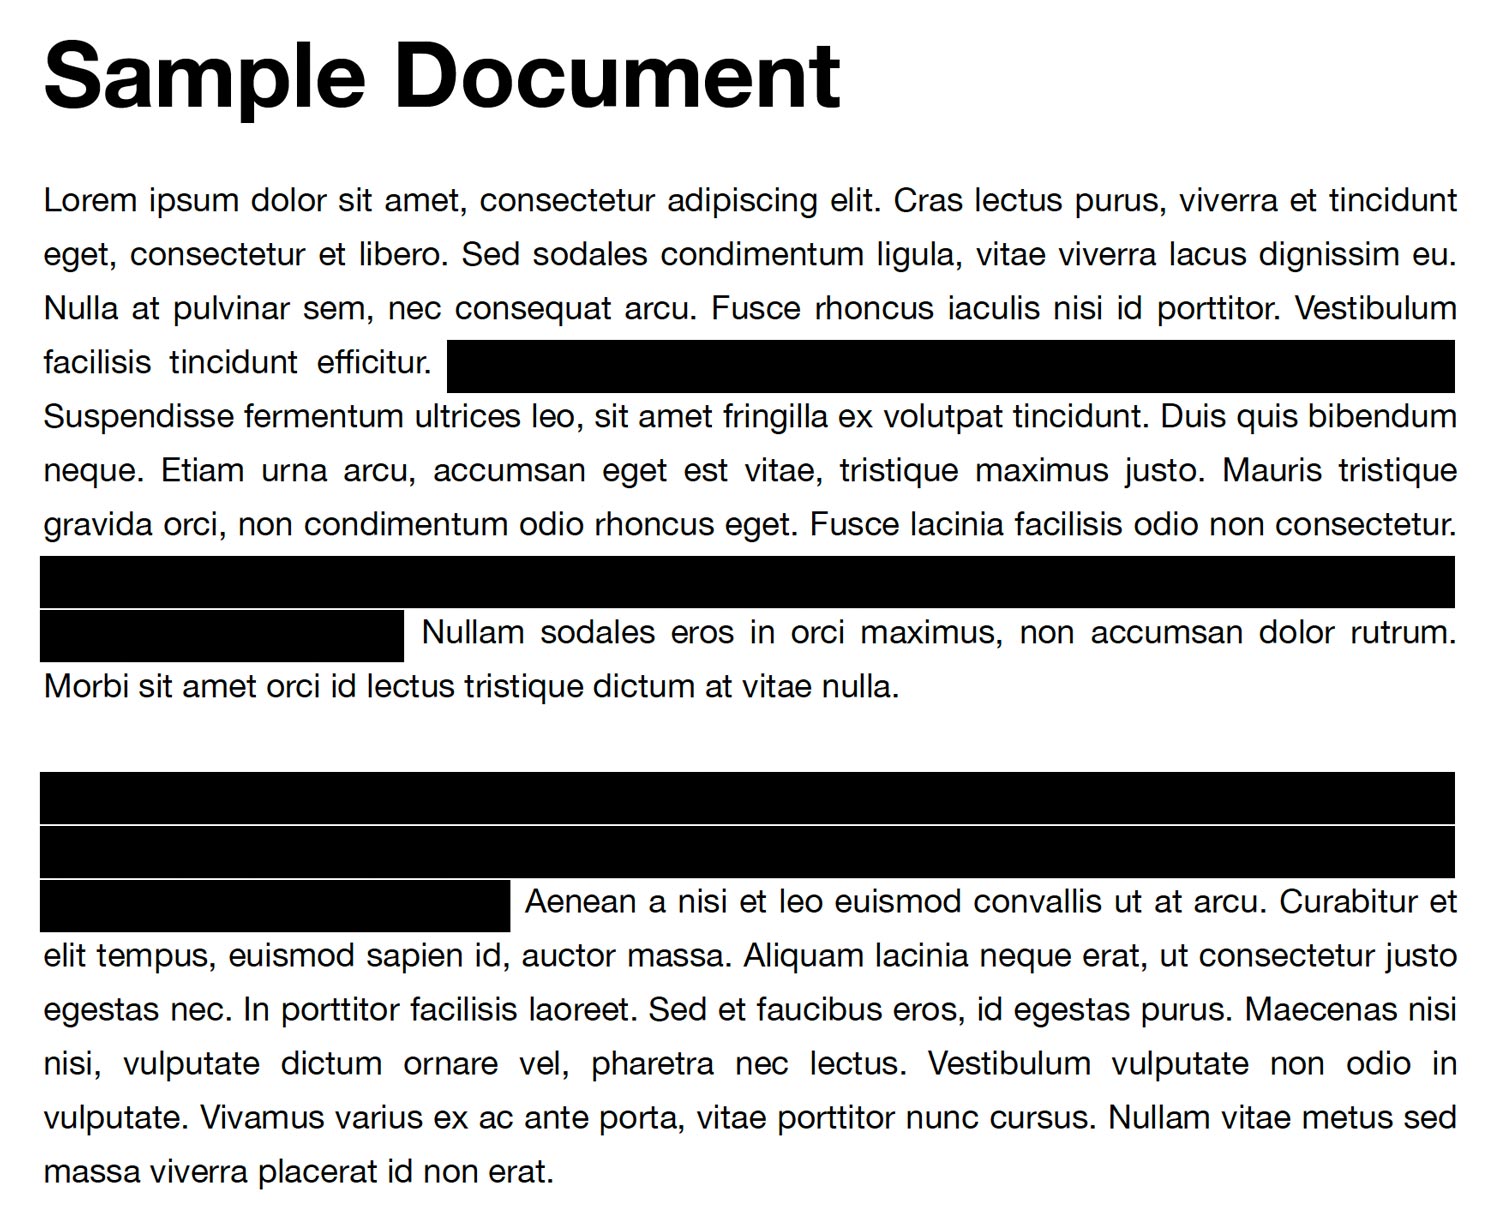
Filers needing to redact sensitive data such as social security numbers, names of minor children, financial account numbers and so on, must do so in a manner that renders the information completely irretrievable to anyone viewing the PDF at a later date. Adding black boxes over the information in Word or another word processor can leave the original text intact underneath in addition to any metadata that should not be shared.
In these situations, any viewer can easily remove these boxes to reveal the sensitive information beneath them. It is the responsibility of the filer to ensure the sensitive data is correctly redacted, and these instructions will guide you through the steps necessary to permanently redact that information.
How to Redact Data in Adobe Acrobat
1. Open the PDF
Open the PDF you wish to redact in Adobe Acrobat Pro DC.
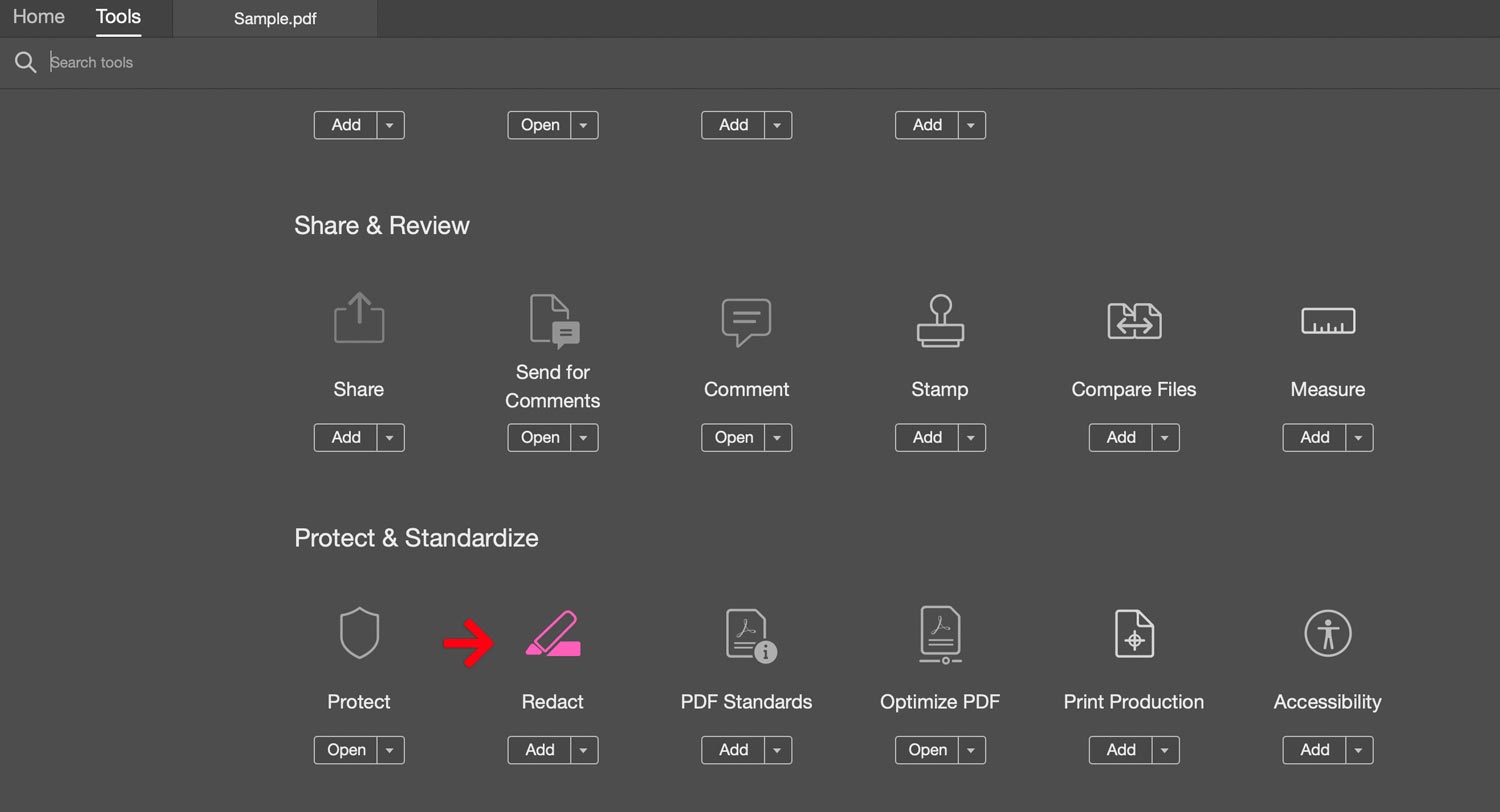
2. Choose Redact Under the Tools Tab
Choose Tools > Redact under the Protect and Standardize section.
3. Pick Your Redaction Type
This option reveals the redaction menu at the top of your document. Redact Text & Images is auto-selected, but you may also choose Redact Pages.
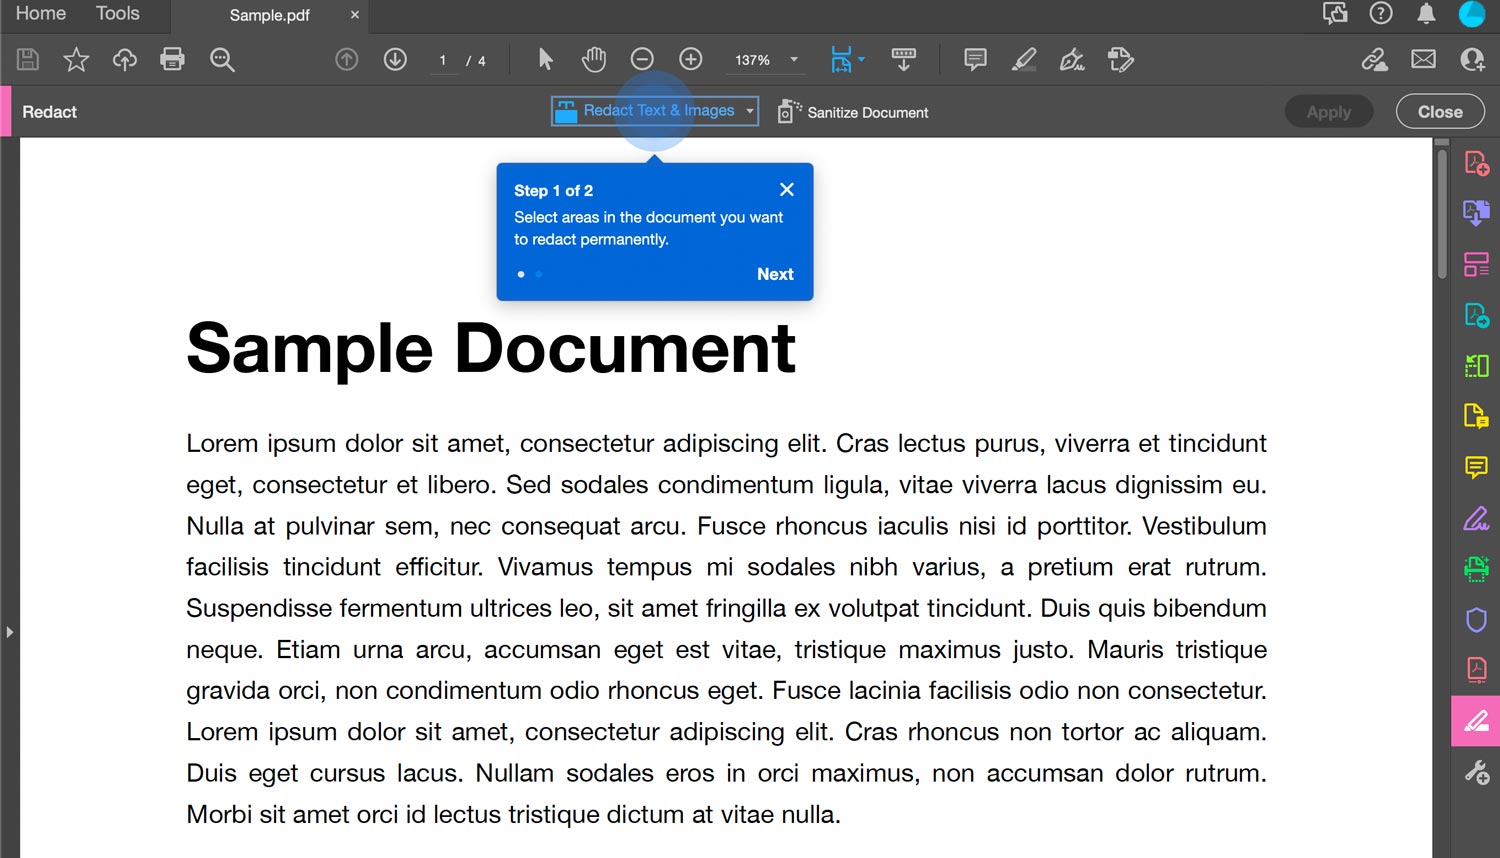
4. Select Any Text and Images
Next select any text and images you’d like to redact. Acrobat will highlight your selections in red. When ready, click the Apply button on the upper right to redact your selections.

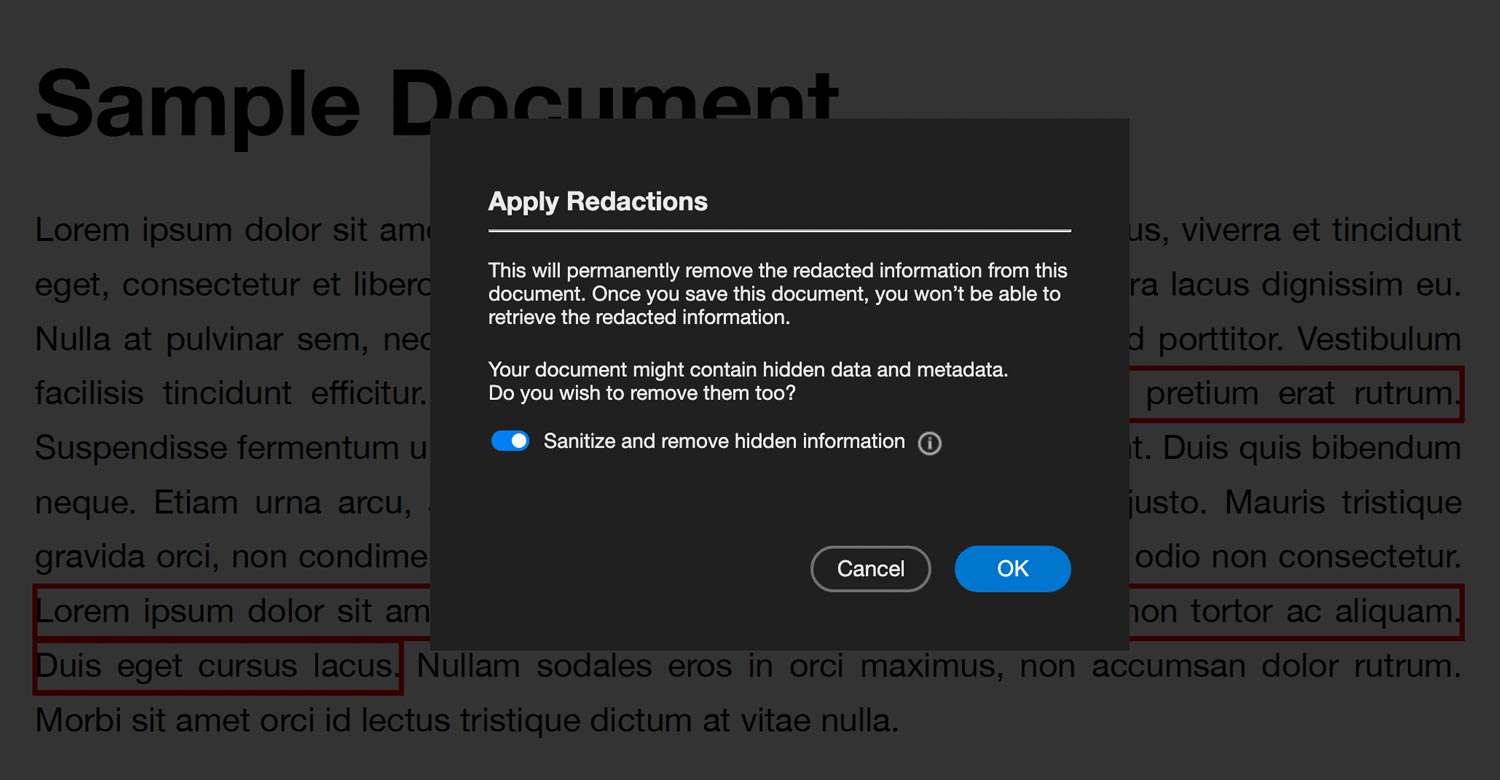
5. Apply Redactions
These redactions are PERMANENT. Adobe Acrobat alerts you to this with a warning box. Make sure to select Sanitize and remove hidden information. Then click the OK button to proceed. When you do so, name your new PDF to keep it separate from your original. Take note of the location on your computer you save the file for uploading later.
6. View Your Newly Redacted PDF
Now you can view your newly redacted PDF. Additionally, you may use the Find Text tool to confirm the redacted text is no longer available.