The Case List Screen displays all cases the user adds to their account. It’s important to note that each user will need to specifically add the cases to that account. Creating a new user on a firm account, or support staff for an attorney does not automatically add the cases to a new account.
View the Case List Screen
From the Dashboard, click the View All button on the Left Menu.

This brings up the Case List screen. Here, you can order the columns between Starred cases, Case Number, Case Title, Court Name, and Client Matter Number.
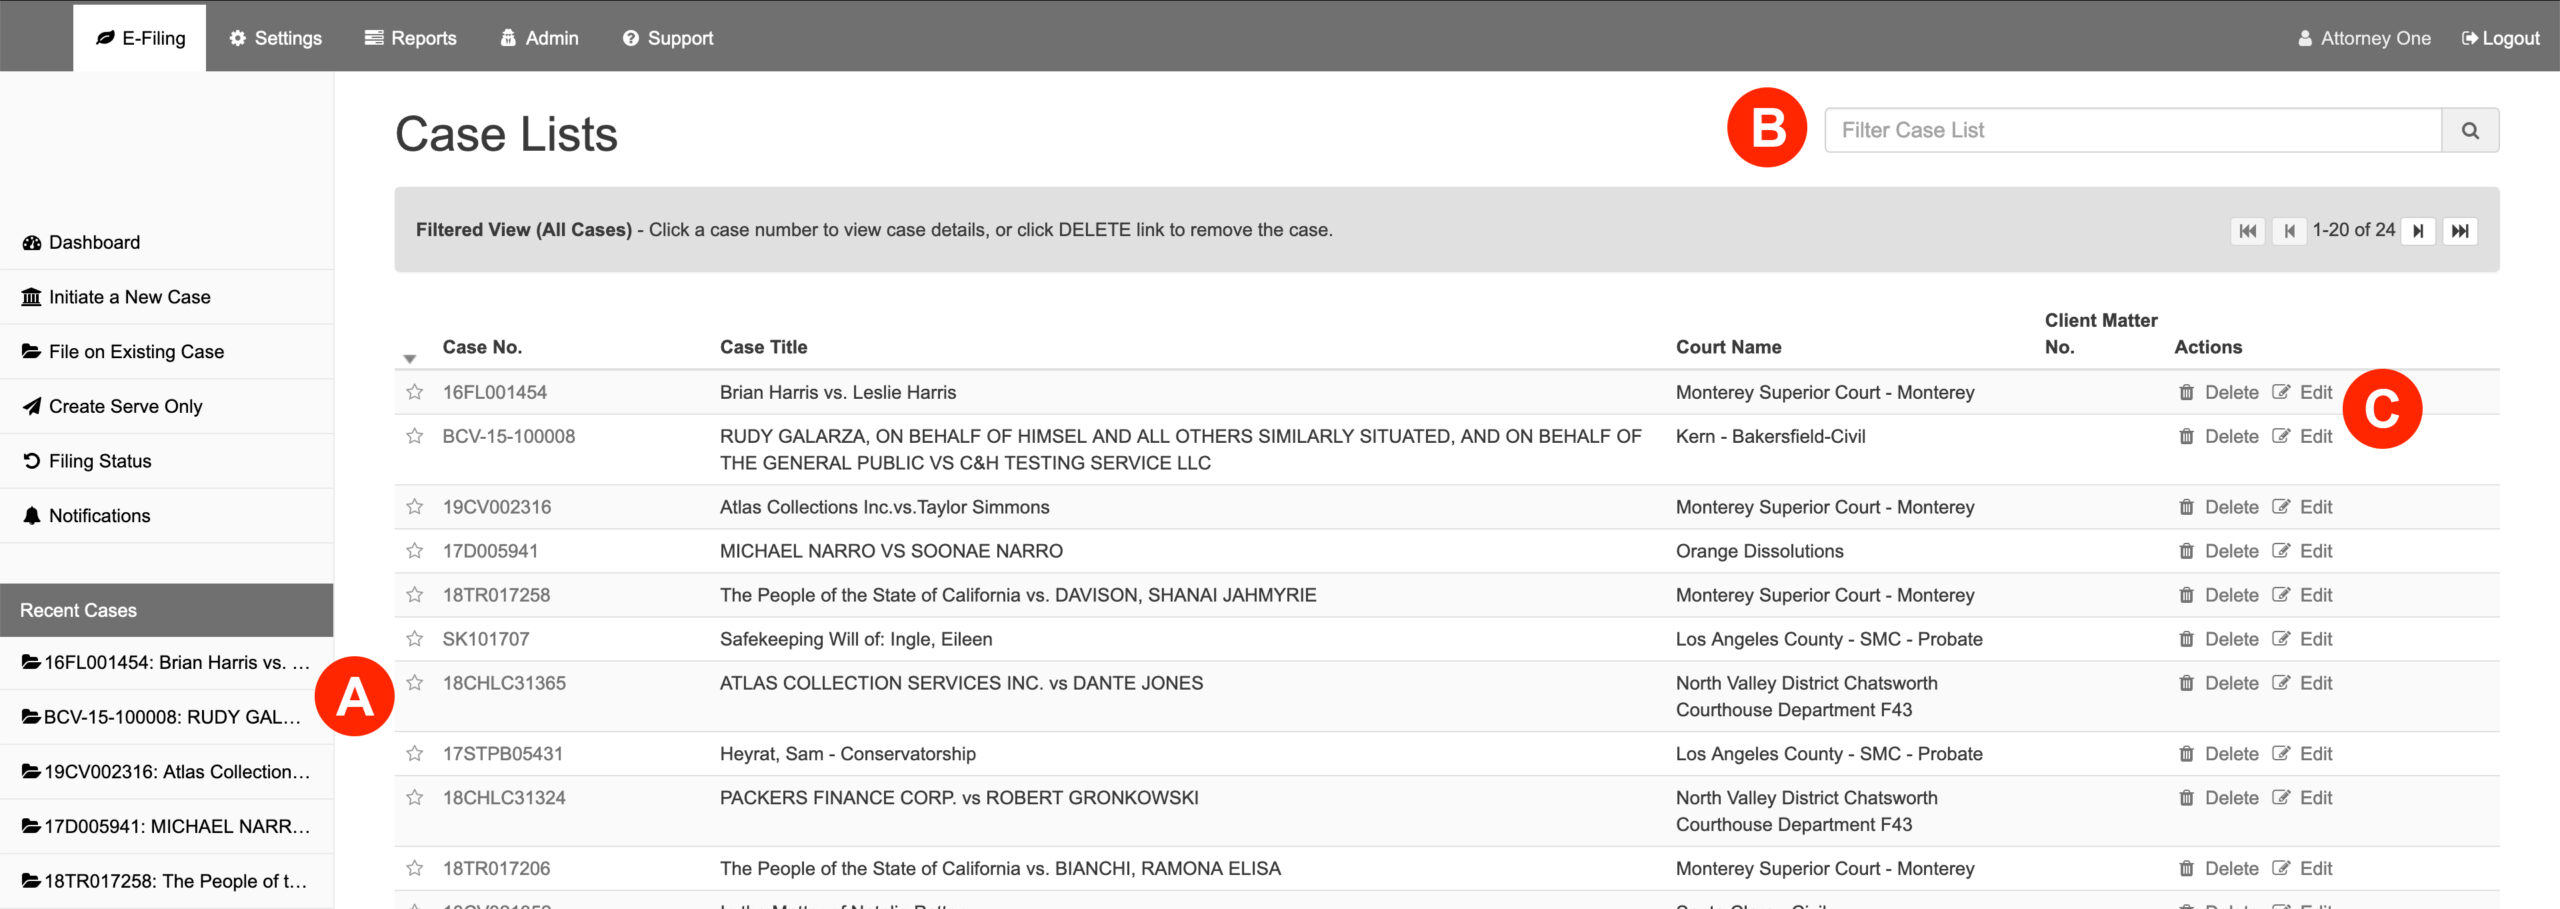
A: Star Selected Cases
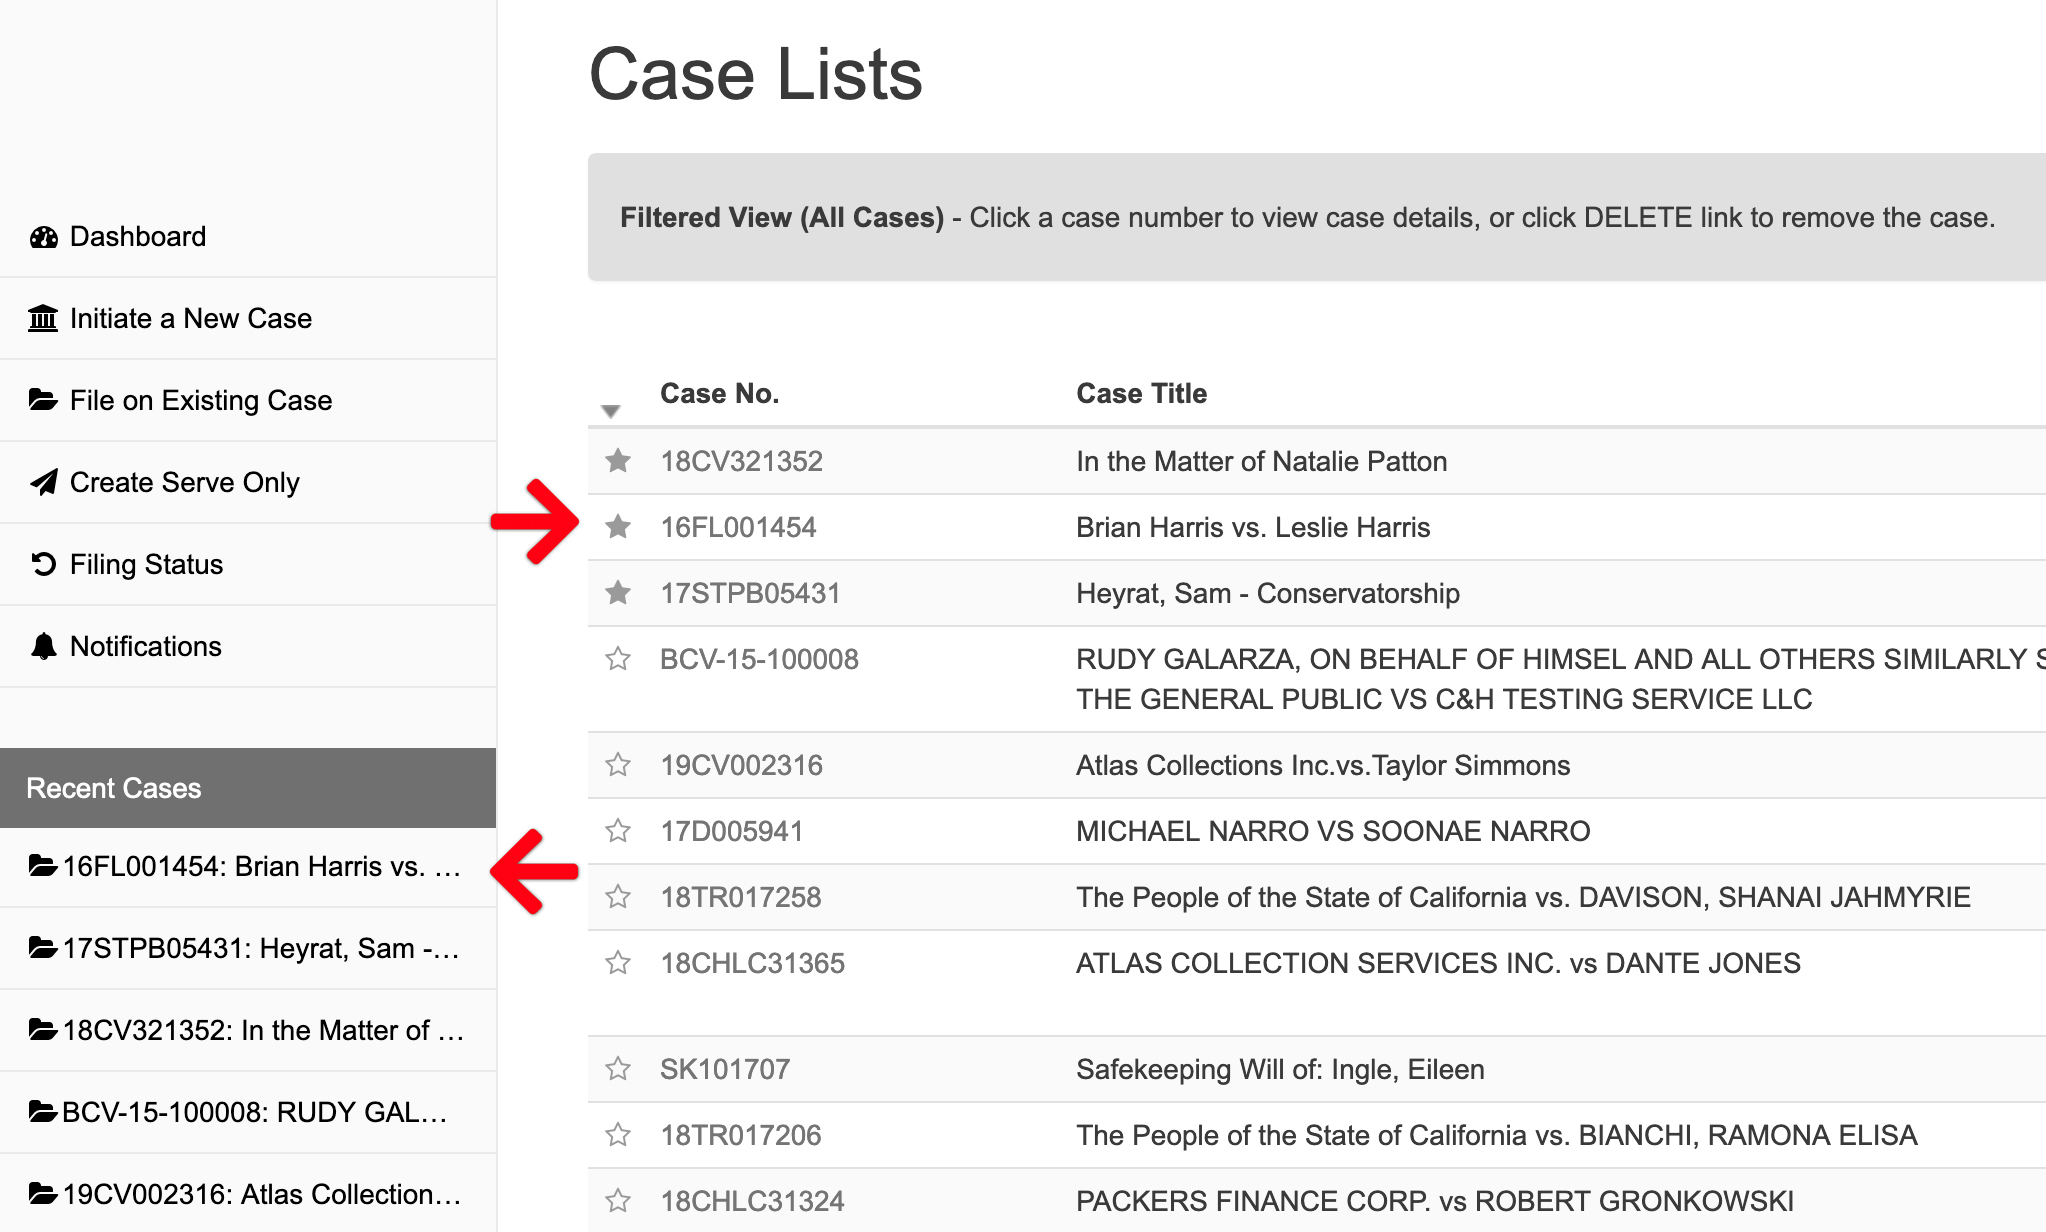
Each user has the option of starring selected cases in the first column of their Case List. When done, those cases now be listed first on the page AND listed first in the Recent Cases section of the Left Menu. This is helpful for those cases that might be more active or frequently accessed in the user’s account.
B: Filter Case List
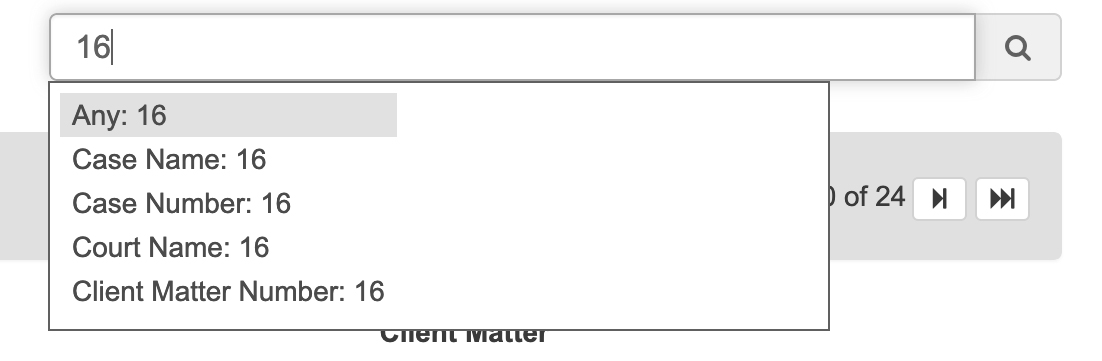
In the Filter Cases box on the upper right, the user may begin typing in the case name or number. This allows the user to filter their results by: Any, Case Name, Case Number, Court Name, and Client Matter Number.
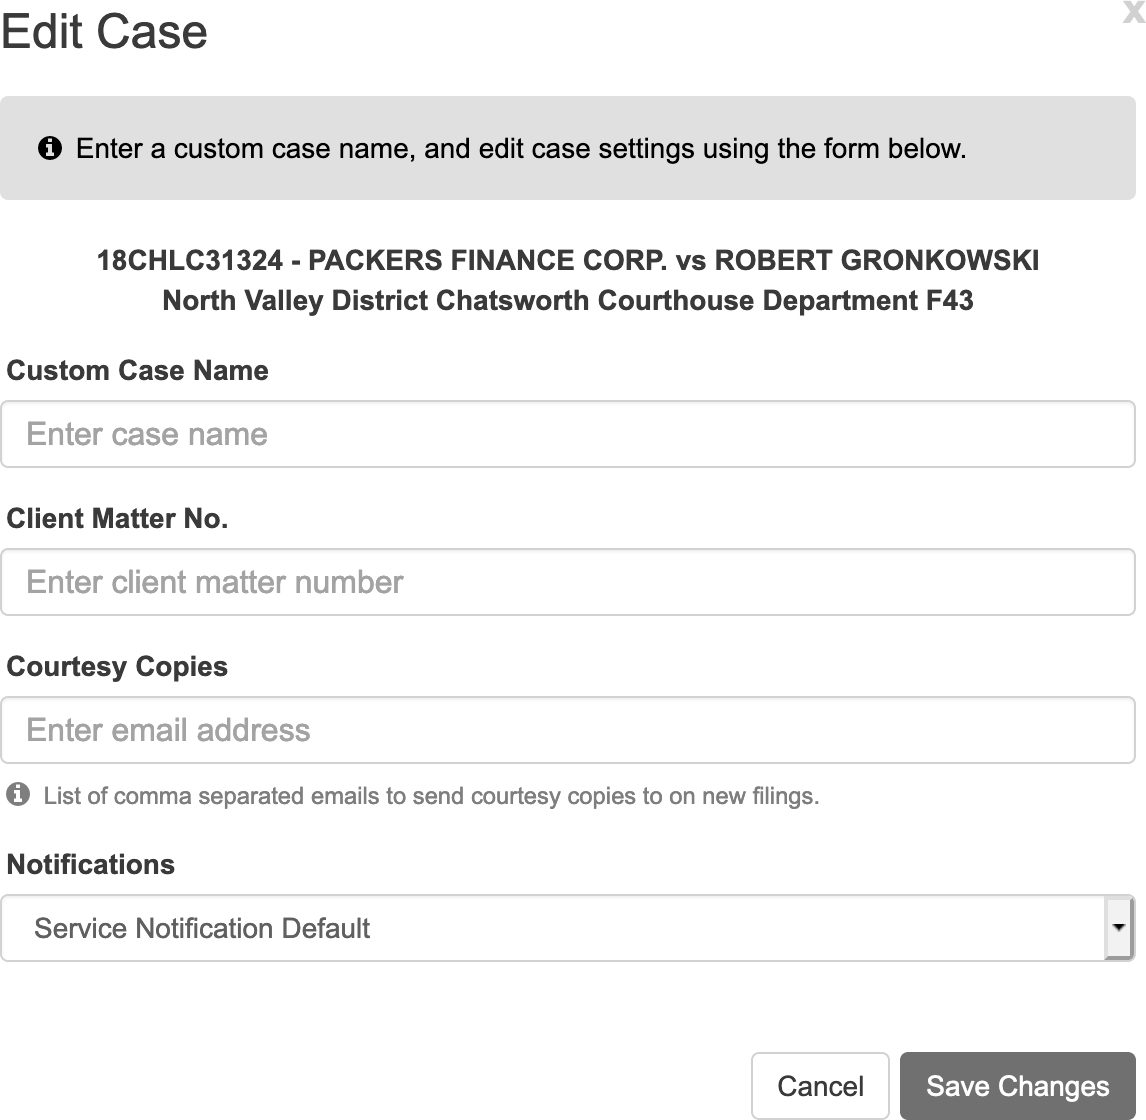
C: Delete or Edit a Case from the List
A user may delete a case from their account at any time when the click the Delete link in the Actions column of the list. Additionally, a user may click the Edit link to enter their own Custom Case Name or assign a Client Matter Number to the case. The user also has the option to add email addresses for Courtesy Copies, and select whether to receive Email Alerts or not.