One of the most common reasons a filing clerk rejects an envelope (submission) is because a filer does not submit their documents as separate PDFs in the same transaction/envelope (e.g. multiple documents are submitted as a single filed document). The general rule of thumb is that for any document that a filer would expect a separate file stamp, they will want to file it as a separate PDF within the same envelope.
Note: If a filer does not expect a separate file stamp for a document, they may add that document to the end of their lead document. Some courts vary on this preference, so if you have any specific questions, it’d be best to reach out to the specific court to advise on their preference.
What to Separate
Say for example, a filer uploads a PDF they list as the Petition. However, the PDF contains the Petition, a Duties and Liabilities of Personal Representative, and a Waiver. The filing clerk will reject this as they need 3 separate PDFs in the same filing in order to give each document its own separate file stamp.
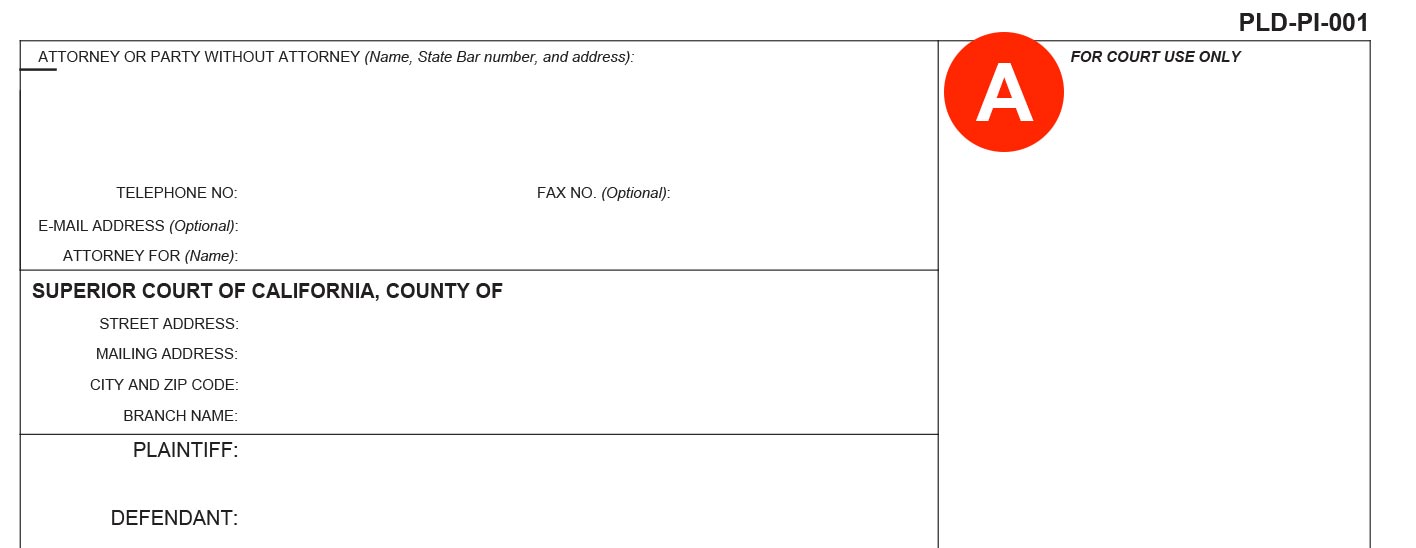
If the document has a place on the first page to put a file stamp, that’s the strongest indication the document should be its own PDF and uploaded separately (letter A).
Additionally, if the document you created has its own caption page, the court most likely wants that as its own PDF to give it a separate file stamp.
Note: Many courts may exclude certain documents from e-Filing. Please check your local court rules, general orders, or FAQs regarding e-filing for exempt documents.
How to Separate (Split) PDFs
- Open the PDF in Acrobat DC.
- Choose Tools > Organize Pages or choose Organize Pages from the right pane if you have that open.
- Highlight the pages you’d like to extract and click the Extract link in the Organize Pages submenu.
- In the secondary toolbar that next appears below the submenu, check the box Delete the Pages After Extracting, and then click the blue Extract button to its right.
- Your highlighted pages will open in a new tab that you may now save with its own file name.
- If you checked the box Delete the Pages After Extracting, the original file will have removed those selected pages. You may either save that document as is, give it a new file name, and/or extract more pages repeating steps 3 and 4.