If your PDF contains interactive fillable fields, you need to “flatten” them before submission as the court’s system often will not process these active fields. Flattening PDFs converts the fields into static content and prevents others from manipulating or editing the information. It can also remove invisible meta data which is incompatible with many of the court’s e-Filing manager’s software.
Unflattened PDF E-Filing Errors
- Immediate System Rejection: The e-filing system may automatically reject your submission because it cannot process documents with active, unflattened fields. This often leads to a “Court Response of Failure” message because the documents weren’t accepted by the court’s internal system, resulting in the entire filing being rejected.
- Digital Signatures Turn Pages Black: Documents with digital signatures, especially those from platforms like DocuSign, can become unreadable. Upon conversion to a text-searchable format by the court’s system, the page containing the signature may turn black, making the filing clerk reject it as illegible.
- Missing File Stamps on Conformed Copies: The court may return your conformed copies without the necessary file stamp. This can happen because unflattened PDFs, particularly those with hidden metadata from certain signing or document management software, interfere with the court’s ability to properly apply its official stamp.
Immediate System Rejection
The primary reason e-filings are rejected is often a simple one: the system can’t process your document. This usually happens when you upload a fillable PDF that hasn’t been flattened. Courts require you to flatten these PDFs not only to ensure they can be viewed on all devices, but also to prevent any manipulation or editing of the information after submission.
Digital Signatures Turn Pages Black
 If you’re using digital signatures from platforms like DocuSign, Essential Forms, or similar software in your PDFs, it’s crucial to flatten your document before uploading it to the e-filing system. These programs often add the digital signature using an invisible layer on top of the page. When e-filing system processes your PDF and converts it to a text-searchable document, that hidden layer can turn completely black, leaving only the signature visible. As you can imagine, a filing clerk will reject this PDF as unreadable. Flattening the document ensures this invisible layer is permanently merged, preventing this common and frustrating issue.
Missing File Stamps on Conformed Copies
If you have a digital signature in your PDF created with DocuSign, Essential Forms, or similar software, you also must also flatten the document because these programs add hidden meta data which is incompatible with many of the Court’s E-Filing Manager’s software. This meta data prohibits the court from adding a file-stamp to the document upon acceptance.
However, this conflict is not relegated to only digital signatures. Some legal document management software can cause issues with file stamp placement as well, and flattening the document will remove those incompatibilities as well.
How To Flatten PDFs
PC Computers
- Open the PDF in Acrobat DC
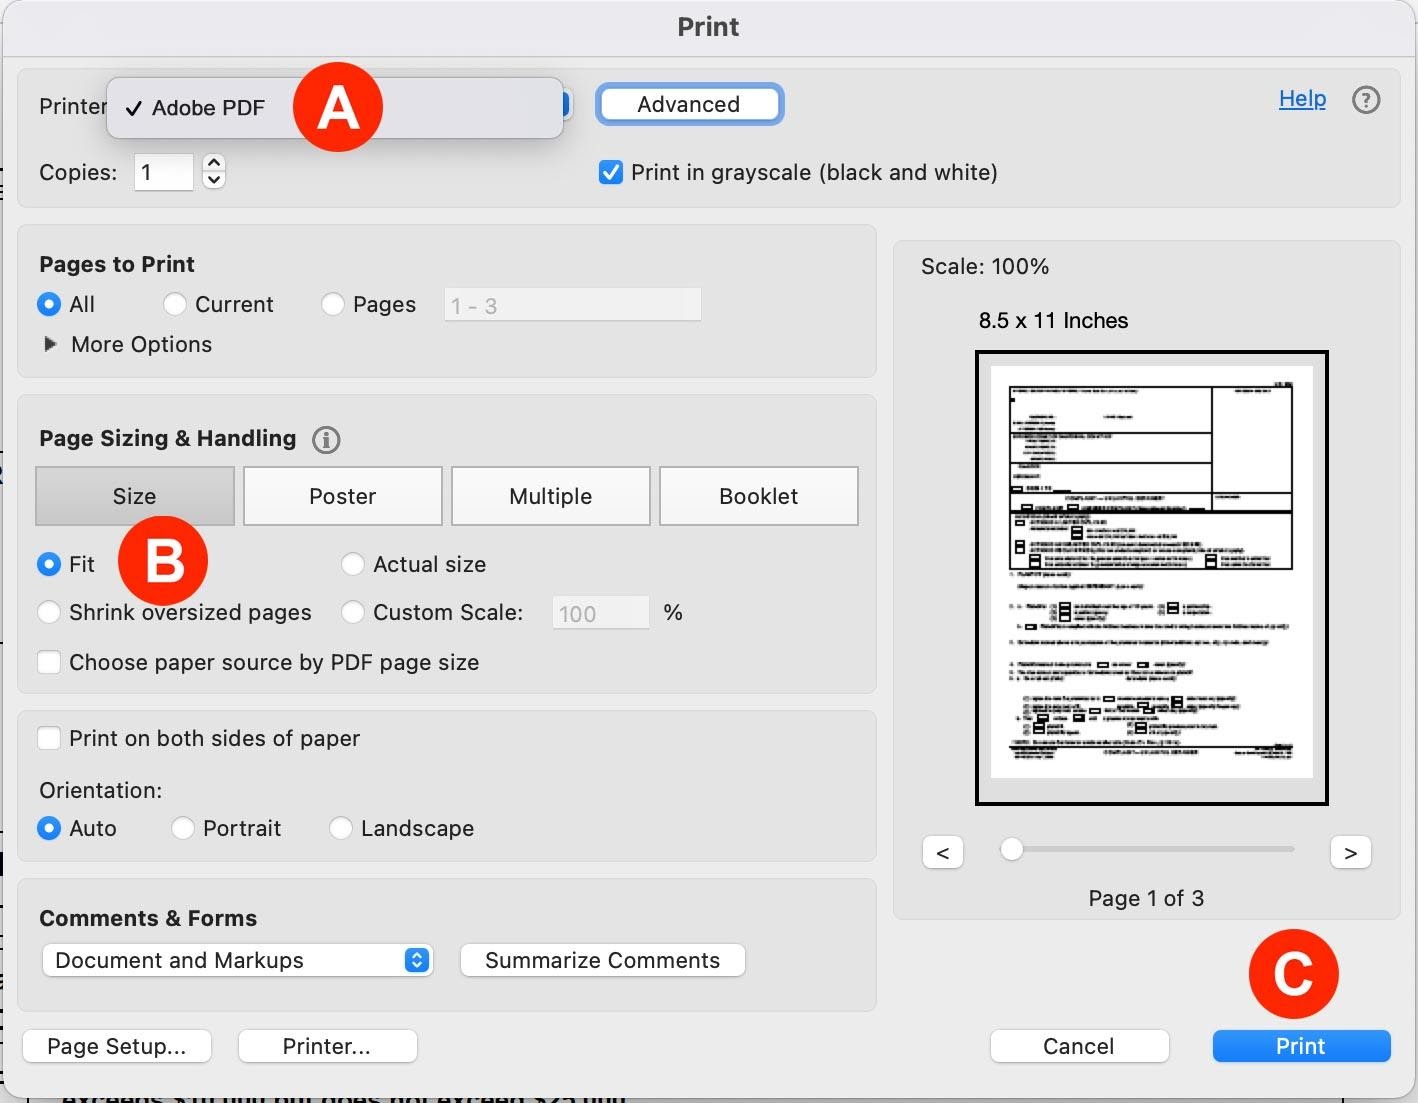
- Then select File > Print
- In the Print Popup, select Adobe PDF as your printer (Letter A).
- Then select Fit in the Page Sizing & Handling section (Letter B). This allows the Adobe PDF print driver to reconvert and scale your document down to an 8.5″ x 11″ piece of paper.
- Finally, click the Print button (Letter C). Since the printer selected above is set to Adobe PDF, the document will not be printed on paper. Instead, you will be prompted to save the document with a new file name.
Mac Computers
- Press Command (⌘) and the Spacebar to bring up Spotlight Search
- Type Preview in the field and click the Preview Icon to open that program
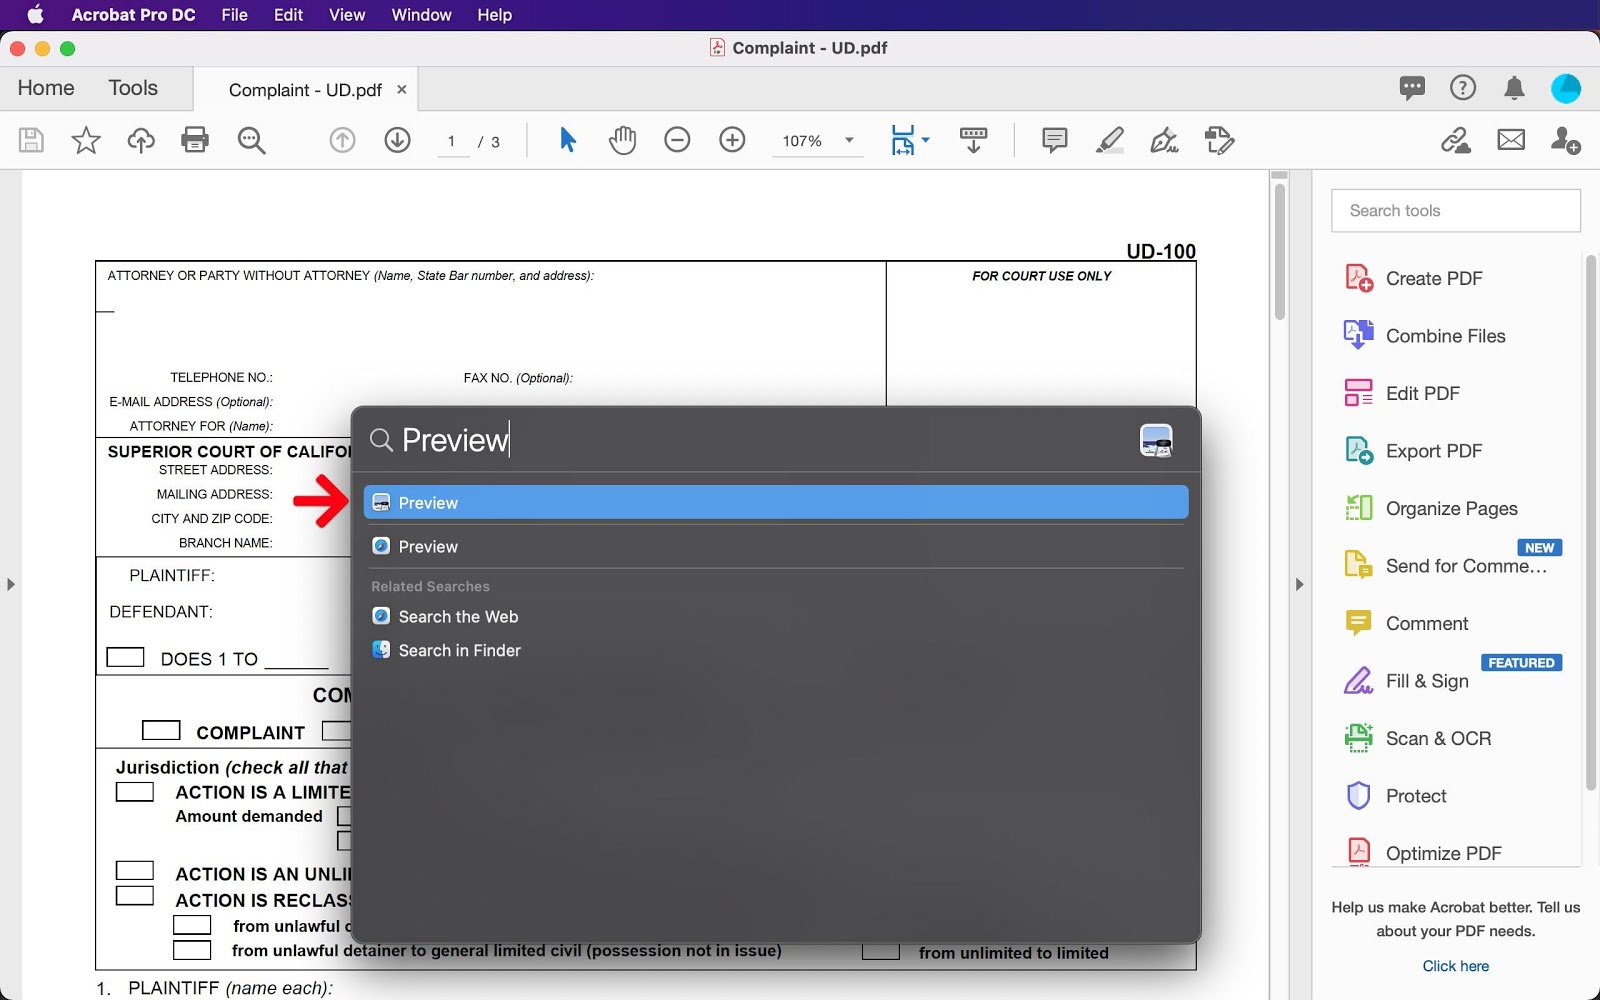
- Open the document in Preview
- Choose File > Print or press ⌘P to bring up the Print menu
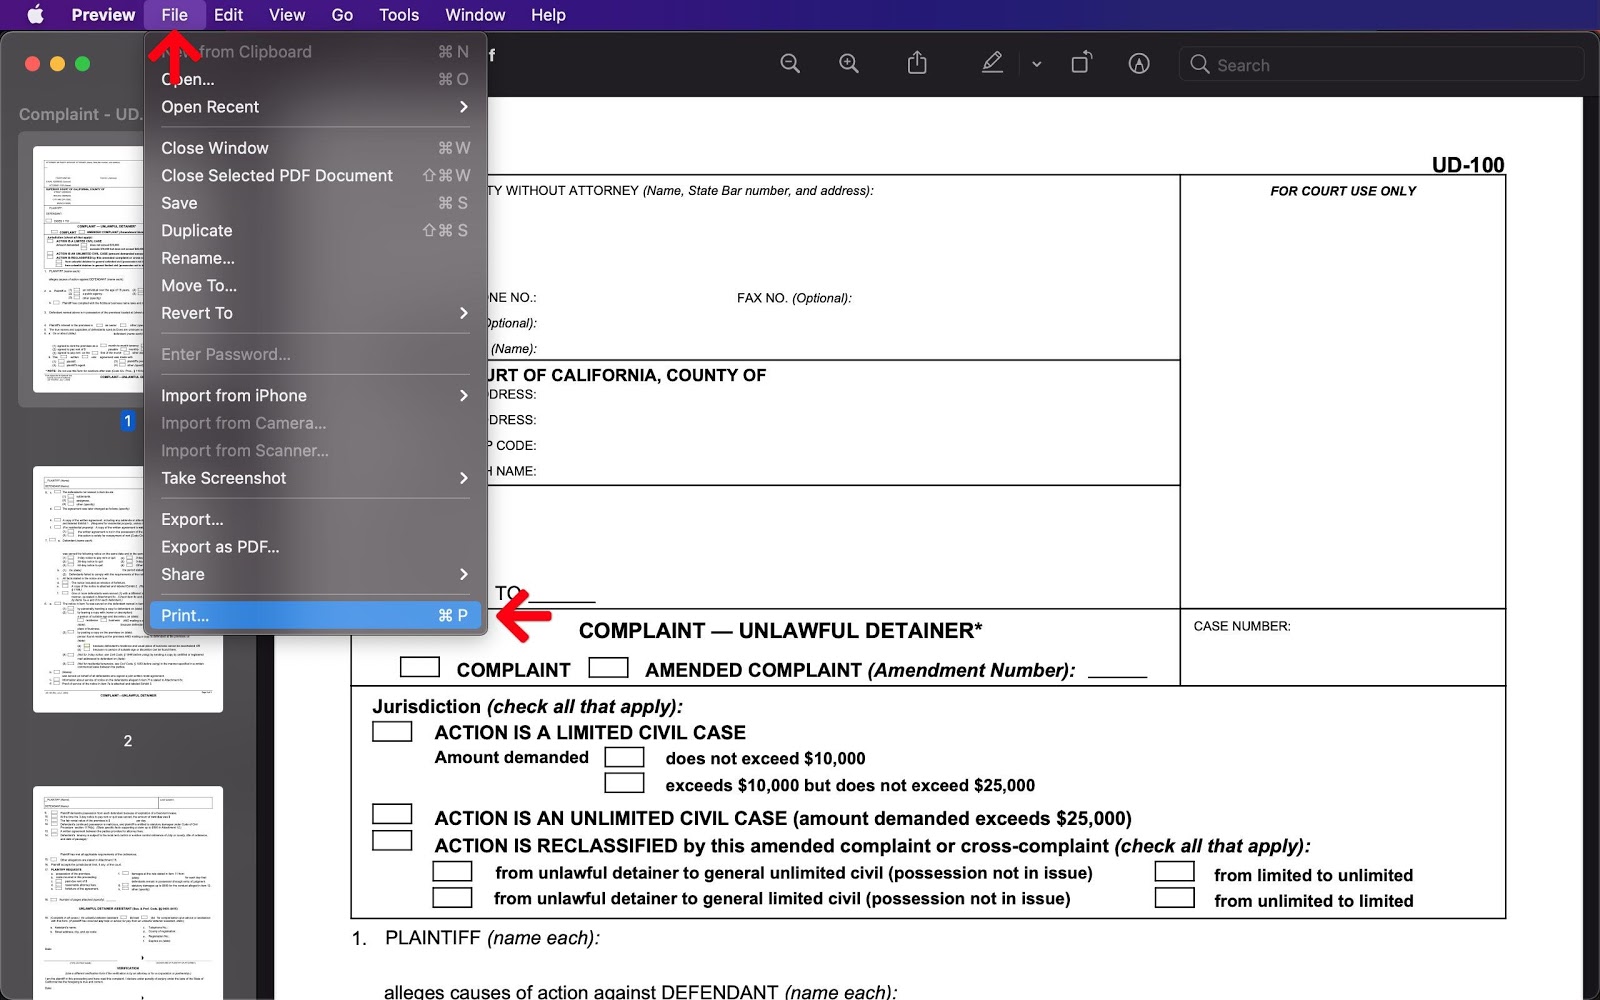
- In the Print Menu:
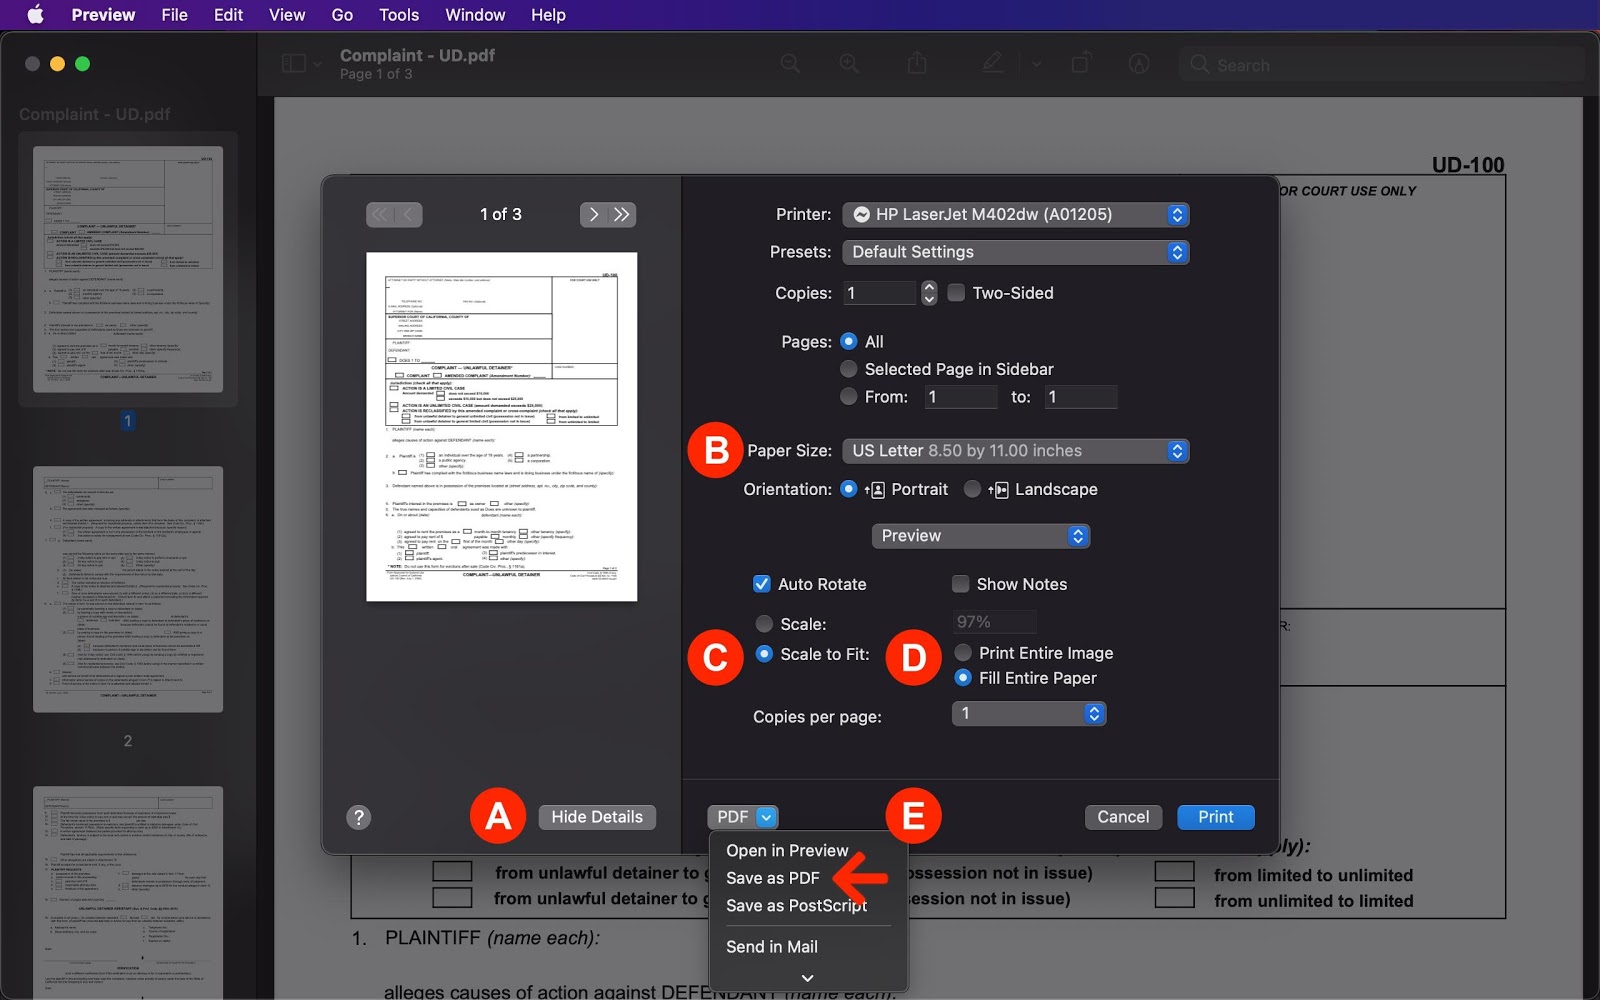
- Click the Show Details button if that option is not selected (Letter A).
- Select a Paper Size of US Letter 8.50 by 11.0 inches (Letter B).
- Select Scale to Fit to scale the document to the selected paper size (Letter C).
Note: If you have photos or documents you need in a landscape format within the document, you will also want to deselect the Auto Rotate checkbox.
- Select Fill Entire Paper (Letter D).
Note: If you have photos or documents you need in a landscape format within the document, you will want to select the Print Entire Image checkbox to avoid the program from cropping out vital information on that page. - Click the PDF dropdown (Letter E), and select Save as PDF. Use a new file name to keep it separate from the original one.